Reclaimed Wood Wreaths
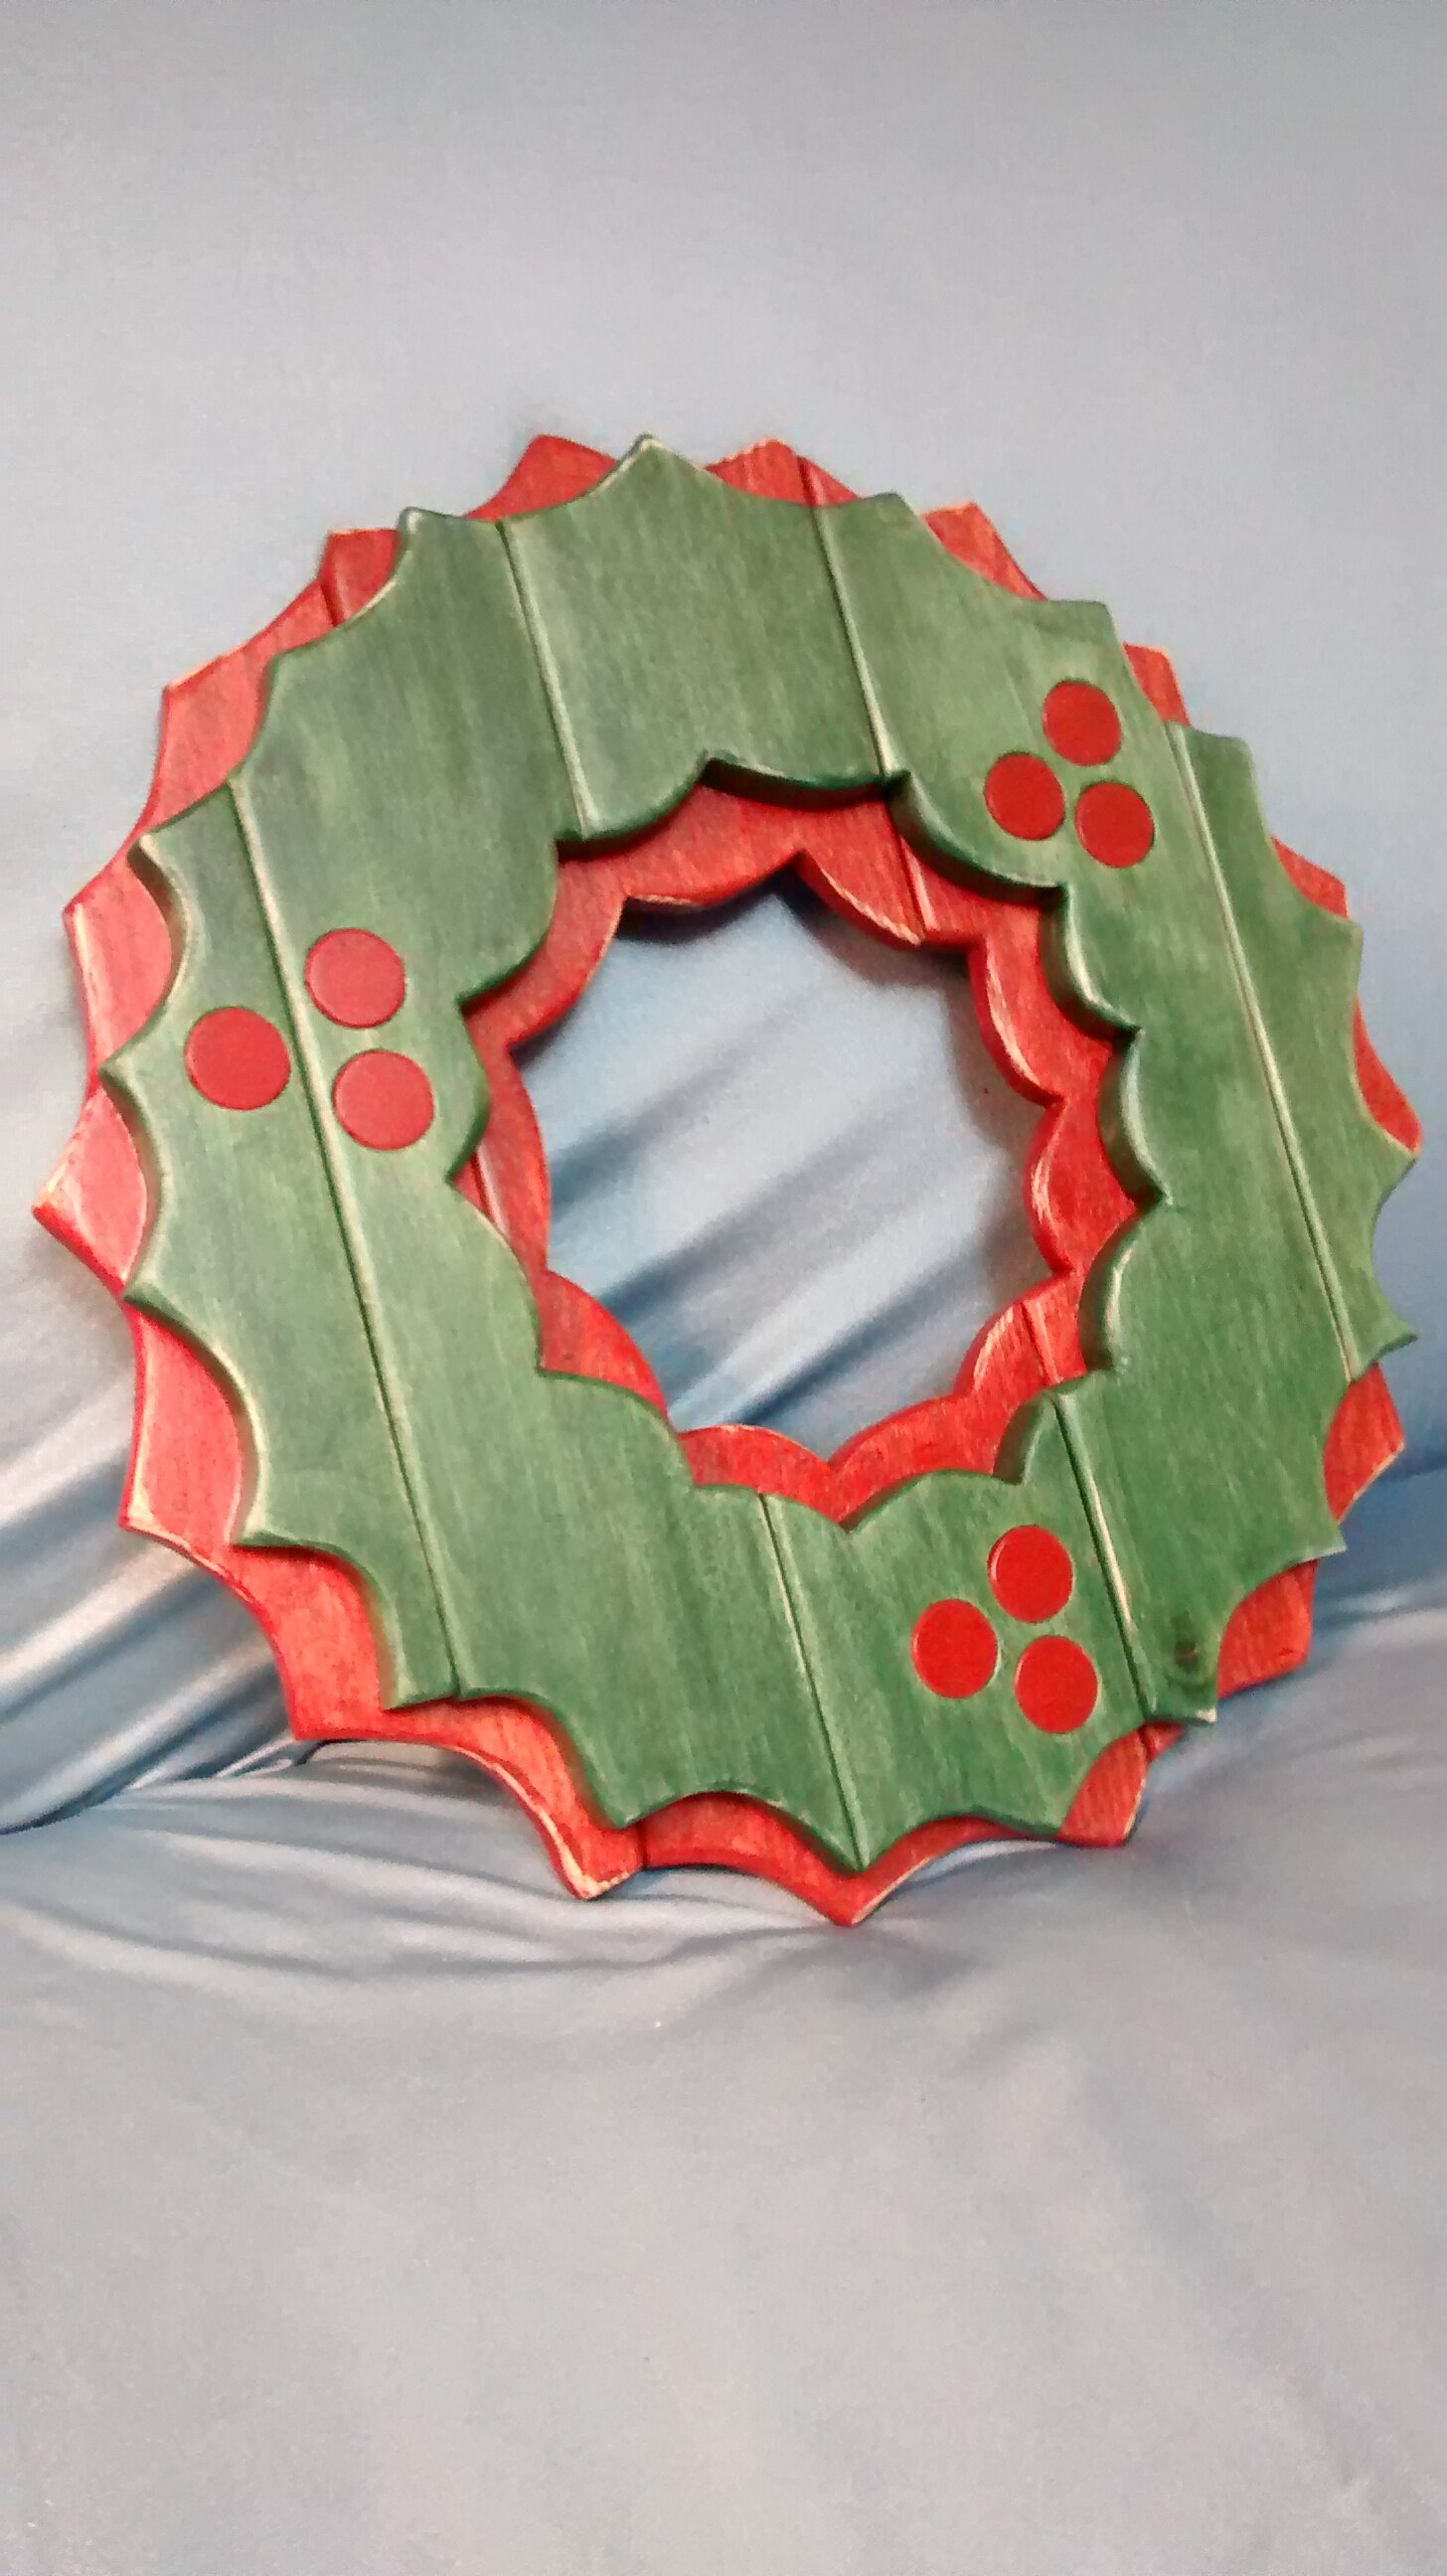
Dimensions: Diameter 14.25 inches; Thickness 1.25 inches. They are meant to be displayed indoors; I did not use exterior-specific finishes. But they should hold up well enough on a front door if well-sheltered from rain/snow.


The Story
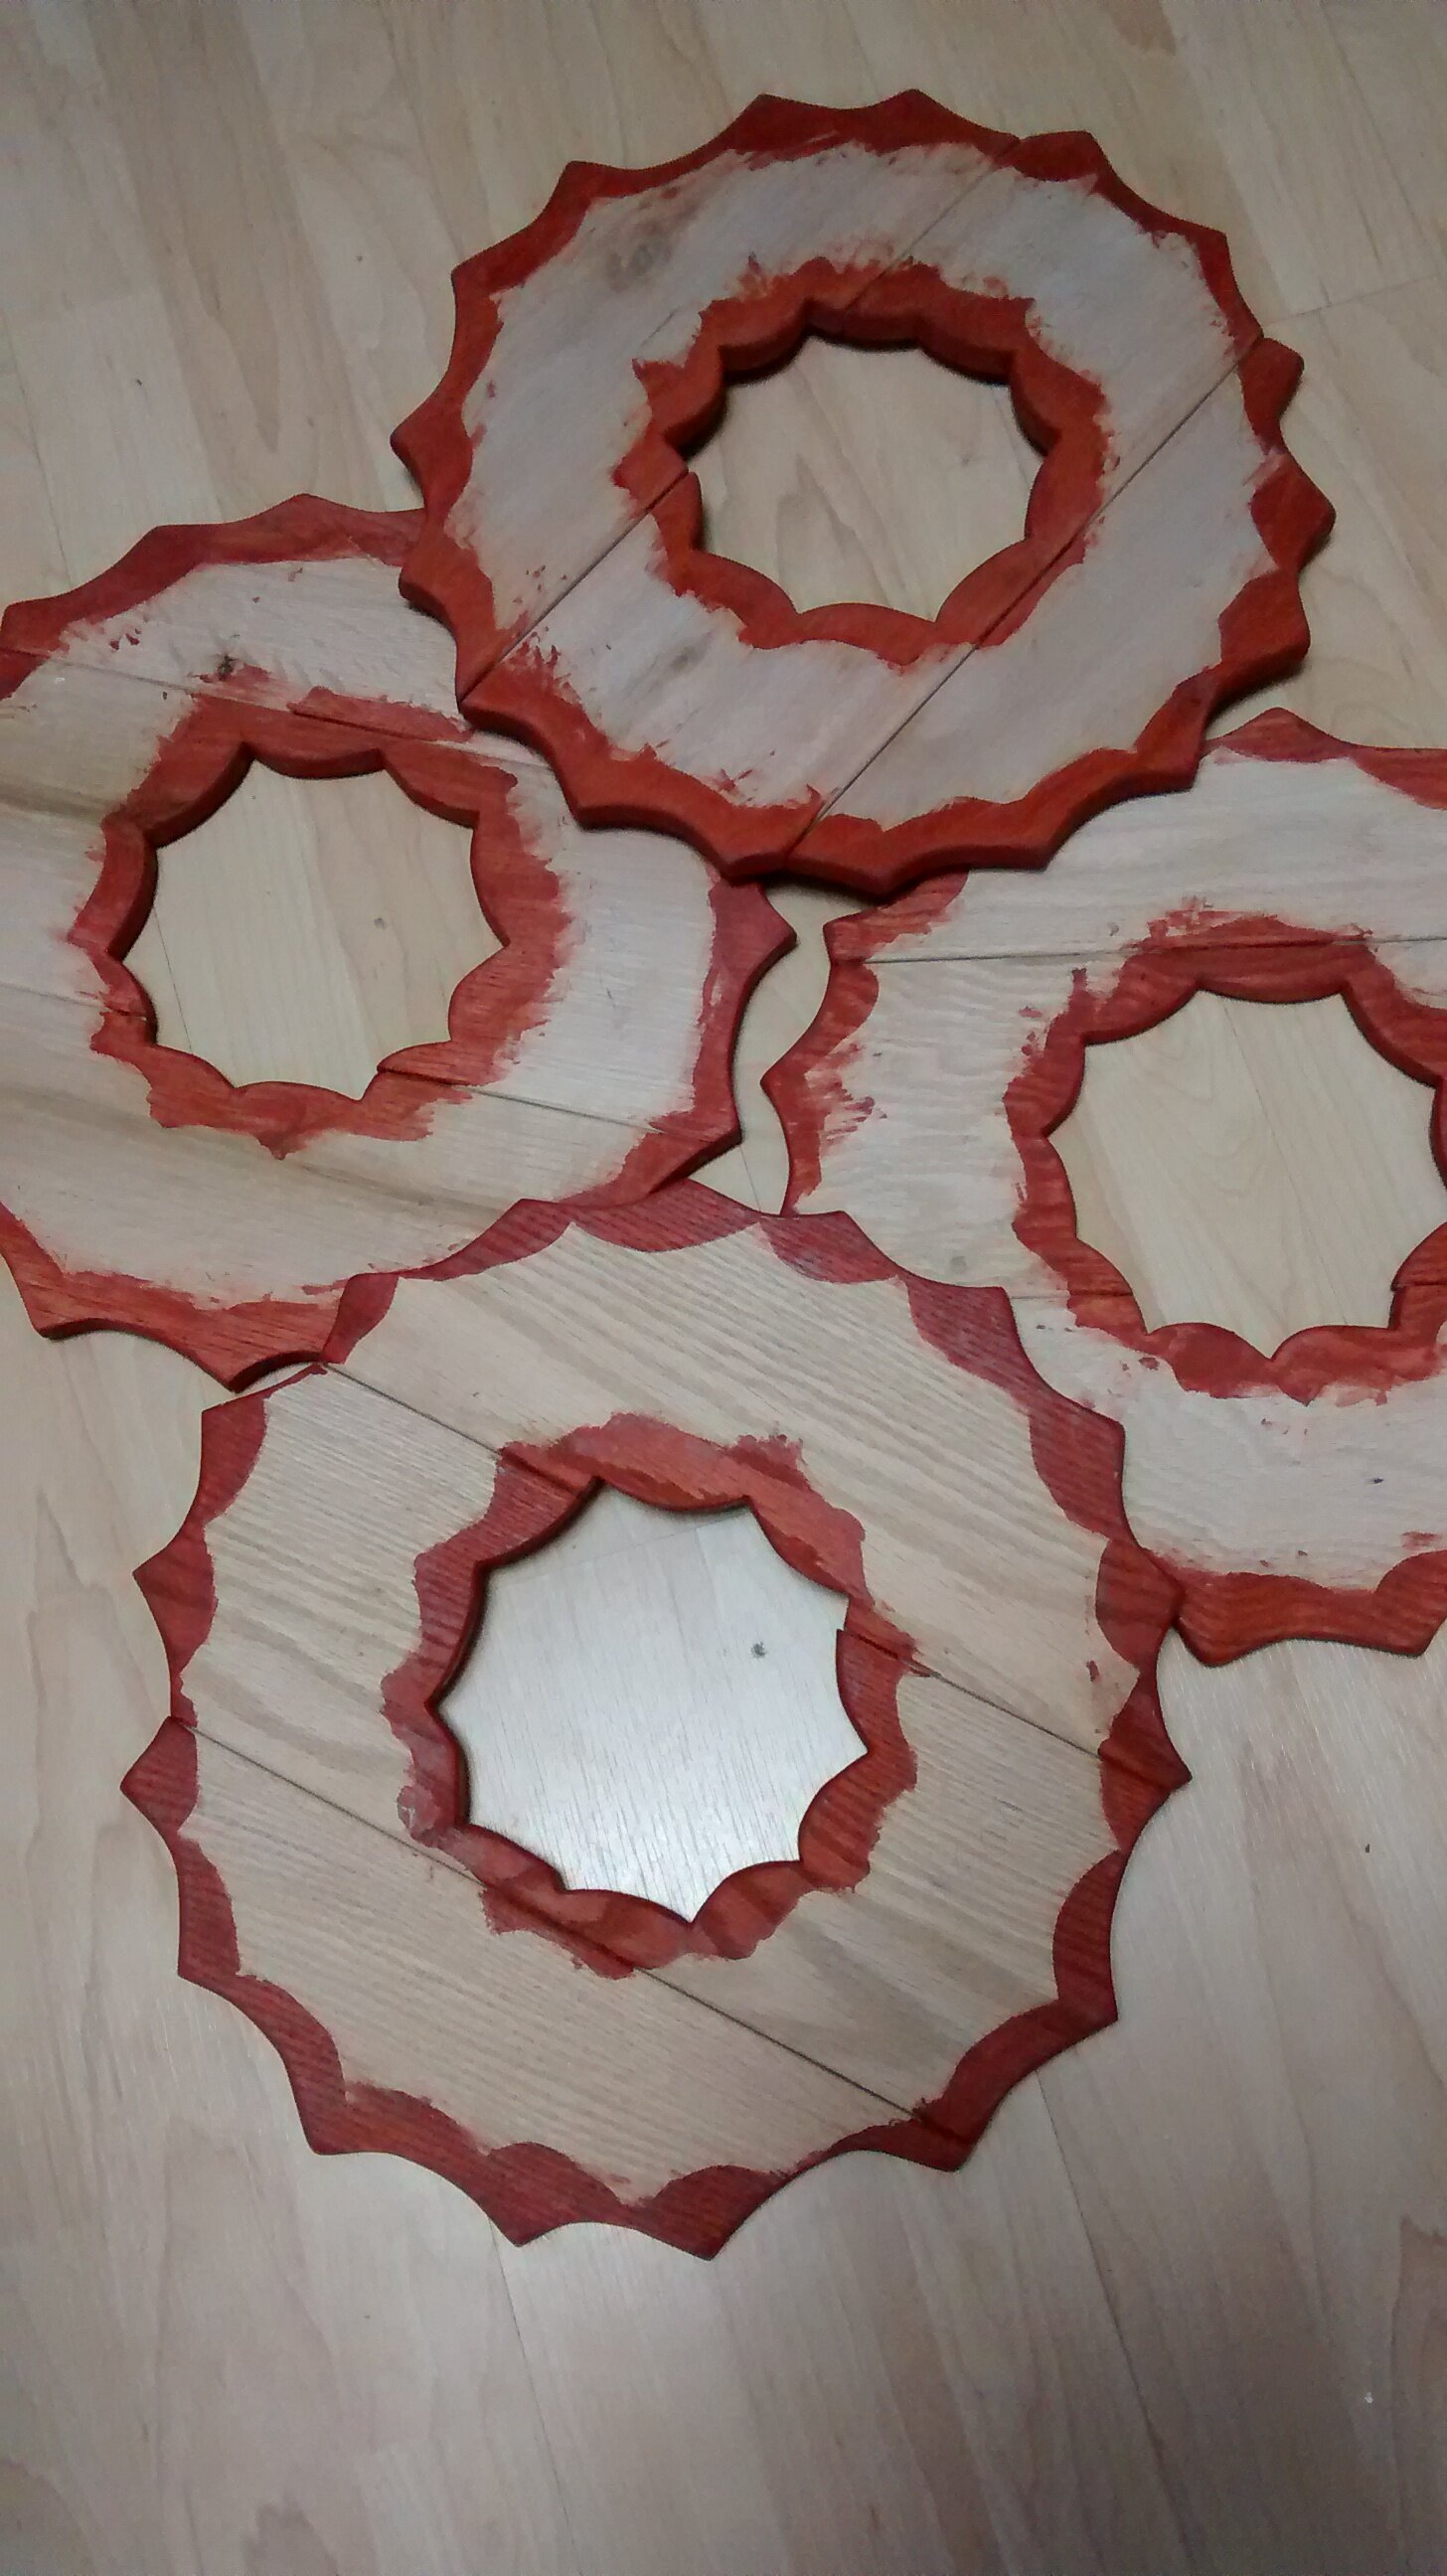
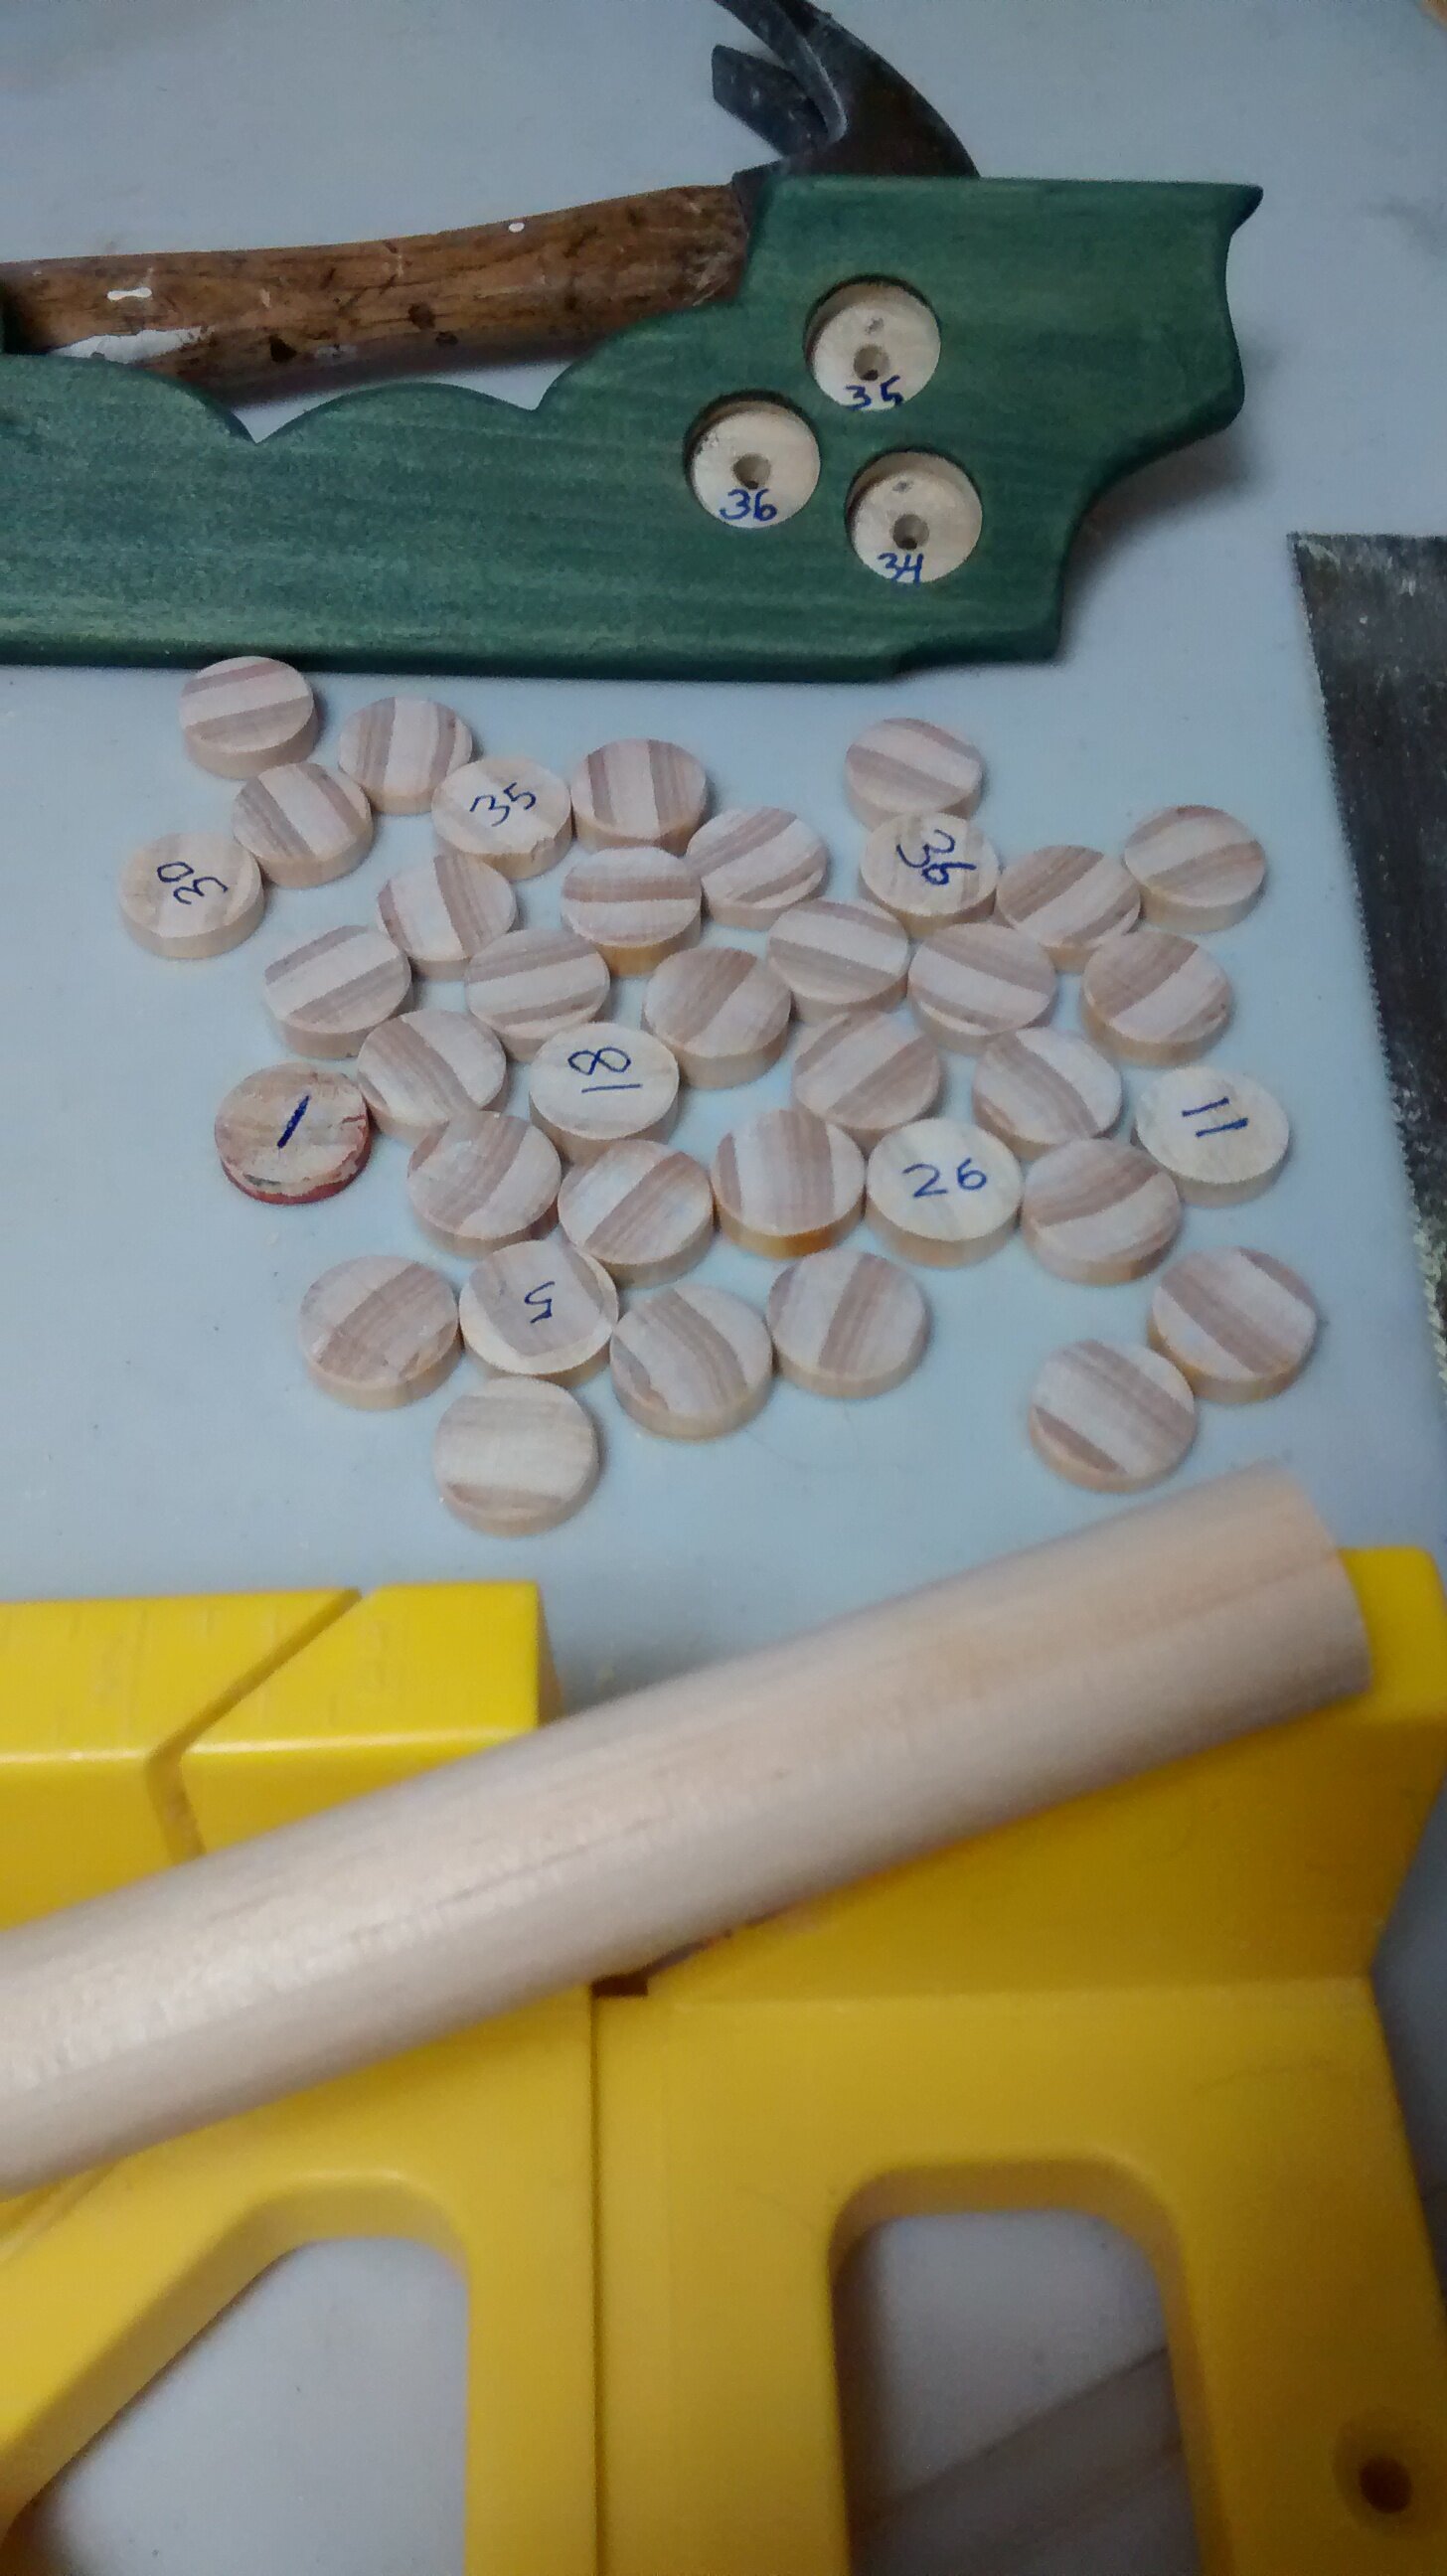
I made these as Christmas presents fof my brothers and parents. I wanted to upcycle wood that some people might see as trash, and to use shapes and colors that would bring to mind wintertime plants like poinsettias and holly leaves with berries, but in a somewhat abstract form. I began by free-handing a template for the bottom layer, then another one for the top layer. I selected and belt-sanded wide red oak pallet wood for the bottom layer. Then I traced the template onto three side-by-side planks and cut out the shapes with a jigsaw. After hand sanding all the edges, I wiped the pieces with water, let them dry, then hand-sanded again with a finer grit, to help them remain smoother later, when stain and polyurethane would be applied. I also created a template slightly smaller than the first one, following the exact same curves, and traced it onto a 1/8-inch-thick sheet of underlayment. This became the backing to which the first layer of pallet-wood boards were glued after their second sanding. After gluing, I applied a red stain on the inner and outer edges that would be visible in the final product; I left most of the wood plain, so glue would work best when attaching the top layer. For the second/top layer, I selected and belt-sanded lighter pallet wood—mostly pine, possibly some poplar—that I thought would look better with a green stain. I traced the template onto side-by-side planks, cut the pieces with a jigsaw, and hand sanded the edges. As with the other layer, I wiped the pieces with water, let them dry, then hand-sanded again with a finer grit, to help them remain smoother later. To evoke the look of berries, I drilled shallow 7/8-inch holes in each top layer, then hand-cut a 7/8-inch dowel into little disks of the right thickness. With both layers of pallet wood and berries and their respective holes, I used letter/number codes to keep track of which segments fit together for each wreath. I stained the top layer pieces green and the berry pieces red. I glued the berries into the holes, then glued the green pieces onto the red base. All the pieces of both layers were glued down one at a time, for at least two hours each. I used sandpaper to remove the stain here and there, to give the wreaths a slightly weathered, rustic look. I applied two coats of Minwax water-based clear satin Polycrylic. Finally, I put a D-ring on the back for hanging.


Related Items: Reclaimed Wine Cork Wreath.